Optimizing Your Business with Landed Cost Calculation in Tally Prime
In today’s competitive business landscape, understanding the true cost of your products is crucial for maintaining healthy profit margins. One often overlooked component of this is the landed cost—the total cost of a product once it reaches your warehouse, including all additional expenses beyond the purchase price. This blog will guide you through what landed cost entails, its importance for your business, and how Tally Prime, enhanced with a custom TDL (Tally Definition Language) solution, can help automate and streamline this critical calculation. With these insights, you’ll be better equipped to optimize pricing, improve profitability, and gain a competitive edge.
What is Landed Cost?
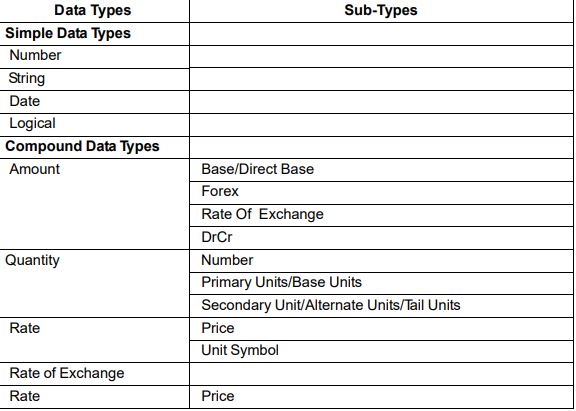
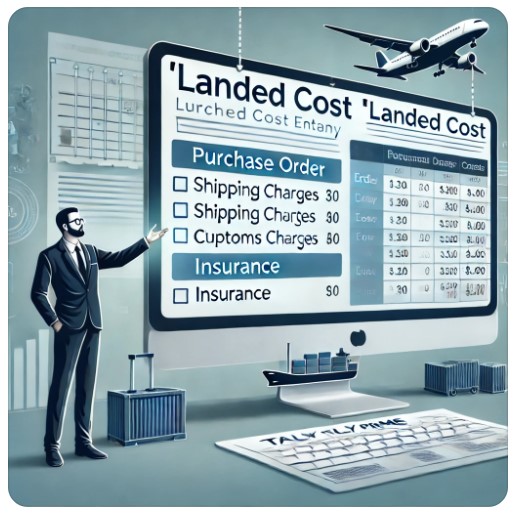
Landed cost refers to the comprehensive cost of acquiring a product, considering all expenses incurred until the product is available for sale in your inventory. This includes:
- Freight Charges: The cost of transporting goods from the seller to your warehouse.
- Customs Duties and Taxes: Government-imposed charges on imported goods.
- Insurance: Coverage for goods during transit.
- Handling Fees: Costs related to the movement and storage of goods within your facilities.
- Miscellaneous Charges: Any other incidental costs such as port charges, brokerage fees, or inspection costs.
For businesses, especially those involved in importing goods or managing complex supply chains, accurately calculating the landed cost is essential. This ensures a realistic view of your total expenses, helping you set appropriate prices and maintain healthy profit margins.
Why Landed Cost Matters for Your Business
Accurately calculating landed cost is vital for several reasons:
- Enhanced Pricing Strategy: With a clear understanding of all costs associated with a product, you can set prices that cover these expenses while ensuring a profit.
- Correct Inventory Valuation: Properly valuing your inventory impacts your financial statements and tax obligations, making accurate landed cost calculation critical.
- Informed Profit Margin Analysis: Knowing the true cost of your products allows for better analysis of profit margins, aiding in strategic decision-making.
- Better Purchasing Decisions: Detailed cost insights empower you to make more informed decisions when negotiating with suppliers or evaluating alternative sourcing options.
Automating Landed Cost Calculation with Tally Prime
Tally Prime is a robust accounting solution, well-regarded for its ability to handle complex financial tasks. However, the default setup may not automatically calculate landed costs, necessitating manual entry and potential errors. To overcome this, businesses can leverage TDL—a powerful scripting language that allows for customizations in Tally Prime.
By implementing a custom TDL script, you can automate the calculation of landed costs, ensuring consistency and accuracy across all transactions. This automation not only saves time but also minimizes the risk of costly errors.
Step-by-Step Implementation in Tally Prime
To get started with this TDL and automate your landed cost calculations, follow these steps:
1. Create the TDL File: Write the script provided above and save it as a `.tdl` file.
2. Load the TDL into Tally Prime:
– Go to F12 > Product & Features.
– Select F4 (Manage Local TDLs) and load your `.tdl` file.
– Restart Tally Prime to activate the new features.
3. Using the New Landed Cost Feature:
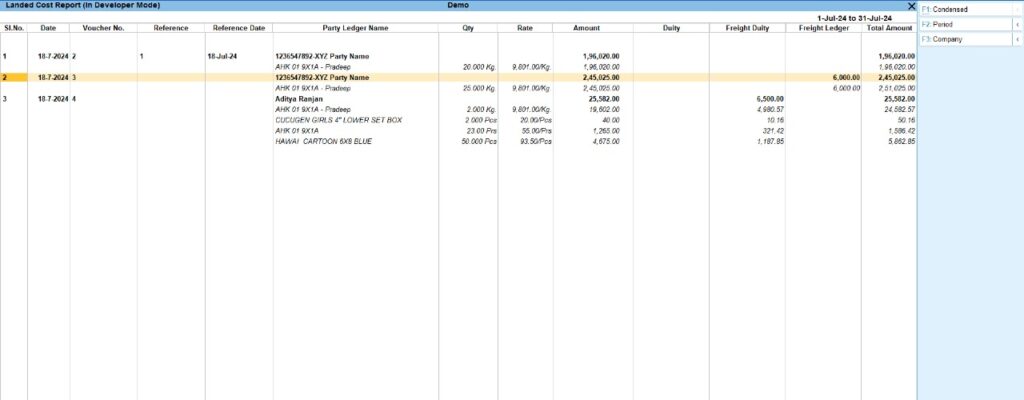
– When recording a purchase voucher, a new field will appear for entering the landed cost.
– Simply input the relevant expenses, and Tally Prime will calculate the total landed cost for you.
This automation ensures that your accounting system consistently reflects the true cost of your products, leading to more accurate financial records.
Business Benefits of TDL Customizations
Incorporating custom TDL scripts into your Tally Prime setup brings several advantages:
- Increased Accuracy: Automating calculations reduces the likelihood of manual errors.
- Efficiency: Streamline the data entry process, saving time and allowing your team to focus on higher-value tasks.
- Consistency: Ensure uniform application of landed cost calculations across all relevant transactions, improving the reliability of your financial data.
These benefits collectively enhance your business’s financial management capabilities, providing a stronger foundation for growth and profitability.
Addressing Common Challenges
Challenge: Businesses often face difficulties in managing fluctuating costs, which can complicate landed cost calculations.
Solution: Regularly update your TDL script or manually adjust inputs to reflect current costs. Advanced TDL solutions can also be developed to dynamically adjust these costs based on real-time data inputs, ensuring your calculations remain accurate and up-to-date.
Grow Your Business with Custom TDL Solutions
At ADISOFTTECH / PRADEEP RAY, we specialize in TDL customizations that empower businesses to get the most out of Tally Prime. Our expert team can develop tailored solutions that automate complex calculations, streamline your accounting processes, and ensure your financial data is both accurate and actionable.
Ready to enhance your business’s financial management? Contact us today to learn more about our TDL customization services and how we can help you achieve your business goals.
Additional Resources
For further reading and to deepen your understanding of TDL and Tally Prime, explore the following resources:
- TallyPrime Official Documentation
- Advanced TDL Programming Guide
- connect with us for tally customization
These resources will help you unlock the full potential of Tally Prime and explore the endless possibilities of TDL customization.
Optimizing Your Business with Landed Cost Calculation in Tally Prime Read More »